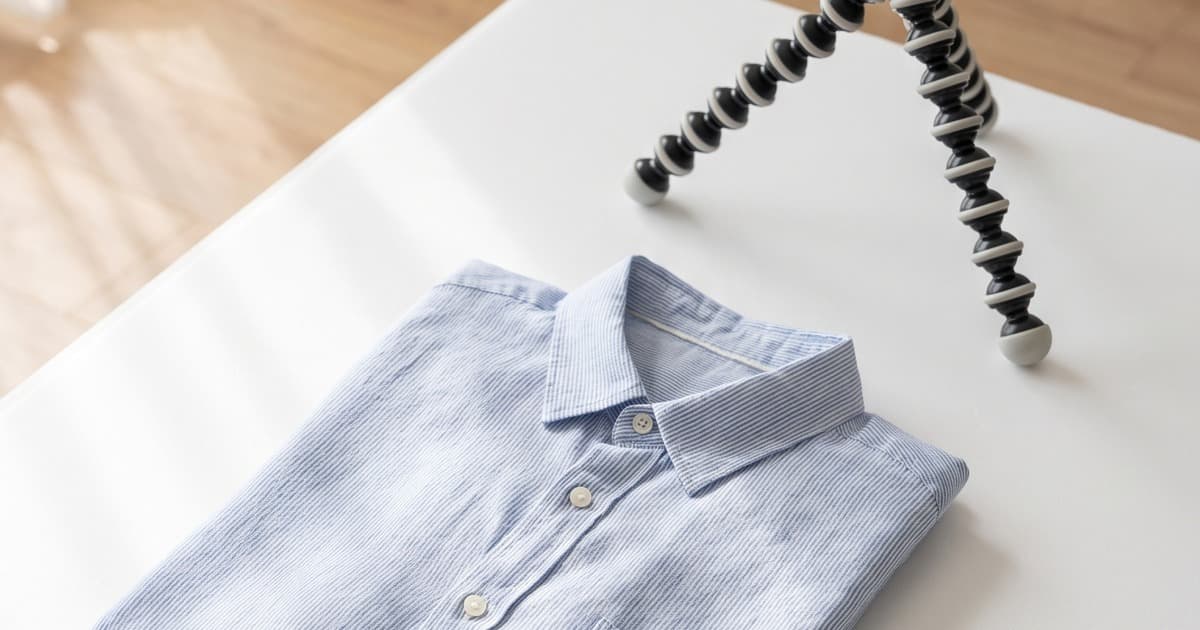
You don't need a professional studio to get product photos that sell. A lot of small fashion brands — and some not-so-small ones — start exactly where you are: a well-lit room, a smartphone, and a desire to not spend €3,000 on a shooting day before you've validated a single product.
This guide gives you the honest truth about home clothing photography. We'll cover the techniques that work, the gear worth buying, and the mistakes that are costing you sales. Then we'll talk about the ceiling — because home photography has one — and what the most efficient brands in 2026 are doing instead.
The Home Photography Setup That Actually Works
You don't need to buy much. Most professional-looking flat-lays come from solving three problems: light, background, and consistency.
Natural Light Is Your Best Friend
The most common photography mistake small fashion brands make is using overhead room lighting. It creates harsh shadows, yellows out colours, and makes even premium fabrics look cheap.
What to do instead:
- Shoot next to a large window — the bigger the better
- Position your flat-lay or hanger setup perpendicular to the window, so light falls across the garment from the side
- Shoot during golden hours (morning or afternoon) when light is soft and diffused
- Overcast days are ideal for flat-lays — cloud cover acts as a giant natural diffuser
On sunny days with direct light? Use a white sheet of paper, a foam board, or even a white curtain to diffuse the beam. Direct sun creates shadows you'll spend hours retouching.
What to avoid:
- Mixing light sources (window light + ceiling bulbs = colour cast nightmare)
- Shooting into the light — your camera will expose for the background and your garment goes dark
- Relying on the phone's front-facing camera — always use the rear lens
Build a Consistent Background
Flat-lay setup: A pure white background is the industry standard for a reason — it focuses attention entirely on the product and looks clean on any ecommerce platform, including Amazon, which has strict requirements for main listing images.
What works at home:
- Large sheets of white art cardboard (A1 or larger for full garments) — from any art supply store
- White foam board (pinboard foam) — thicker, stays flat, available at Ikea or similar
- A clean white wall or painted floor section
- White bedsheets or plain cotton fabric (iron them — wrinkles will show)
Avoid photographic seamless paper unless you have a proper setup. It tears, creases at the edges, and is harder to store than a simple foam board.
Hanging/ghost mannequin setup: For a clean "invisible mannequin" look, hang garments on a clear acrylic hanger against a white or neutral wall. This shows shape better than a flat-lay and works well for structured pieces like jackets and coats.
Consistency: The Thing Brands Actually Fail At
Consistent angles and framing matter more than perfect photos. If your product grid has five images shot at slightly different angles, different zoom levels, and different background tones — it reads as amateur, full stop.
How to lock in consistency:
- Mark your floor position with tape — so you shoot every product from the exact same spot
- Use a tripod or phone stand — eliminates camera shake and keeps framing identical shot to shot
- Set your camera to manual exposure — auto exposure shifts every time you add a new garment, which is how you end up with a warm jacket photo and a blue jeans photo that look like they came from different shoots
- Keep one light source, one position, every time
This is actually the hardest thing to get right with home photography — and it's where most brands start cutting corners as the product count grows.
Gear Worth Buying (And What to Skip)
You don't need much. Here's a quick breakdown:
| Item | Cost | Worth It? |
|---|---|---|
| White foam boards (A1, pack of 5) | ~€15 | ✅ Yes |
| Flexible phone/camera tripod | €20–€40 | ✅ Essential |
| Acrylic clothes hangers (clear) | €10 for 10 | ✅ Good for structure |
| Portable LED panel light | €40–€80 | ✅ If you have no good window |
| White reflector card (large) | €5 | ✅ Bounce shadow fill |
| Light tent/studio box | €30–€60 | ❌ Looks sterile for fashion |
| Ring light | €25–€60 | ❌ Flat light, no depth |
| Backdrop stand + seamless paper | €80–€150 | ❌ Skip until you need more |
For editing: Free tools like Snapseed or VSCO handle basic brightness, white balance and sharpness correction from your phone. For desktop, Lightroom's free mobile app is excellent. Avoid heavy Instagram-style filters — they date quickly and create inconsistency across your catalogue.
Shooting Techniques for Common Clothing Types
Different garments need different approaches. Here's a quick breakdown:
T-Shirts and Tops
Flat-lay works well for these. The key is steaming before you shoot — every single time. Even a slight wrinkle reads as product defect. Use a garment steamer (€30–€50, worth every cent) and steam while hanging, then lay flat and shoot immediately.
For polo shirts and structured knits, a ghost mannequin or stuffing with tissue paper to hold shape gives better results than a completely flat lay.
Trousers and Skirts
Flat-lay: fold at the natural hem line, align seams straight, and shoot from directly overhead (ladder or raised platform — never shoot at an angle).
For trousers especially, buyers want to see the cut and leg fall. A hanging shot from a mannequin torso or trouser hanger does this better than flat.
Jackets and Coats
These almost always photograph better on a ghost mannequin or hung with proper structure. Pop the collar correctly, button to the intended button, and ensure lining isn't showing unless it's a feature.
For flat-lay: use tissue paper stuffing in the arms and body to give natural shape. It looks strange in person but reads perfectly in photos.
Dresses and Jumpsuits
Window + ghost mannequin is the ideal for these — it shows length, structure, and silhouette. If you don't have a mannequin, hang from a doorframe with the garment steamed and laid flat for a top-to-hem shot from above.
The Ceiling: What Home Photography Can't Do
Here's the conversation most guides avoid. Home photography can get you decent flat-lays. With the right setup, you can hit a professional standard for ecommerce basics.
But there's a hard ceiling.
A flat-lay, no matter how well executed, cannot show:
- Fit — how the garment sits on a body, where it pulls, how waistbands sit
- Movement — fabric drape, hem swing, how a dress moves with the body
- Proportion — is this oversized by design or does it just look big?
- On-model context — the editorial styling that makes a customer say "I want that look"
The data backs this up: product pages with on-model images consistently outperform flat-lay-only pages on add-to-cart rate and on return rates. Customers who see a garment on a realistic model have a better understanding of fit — and return less.
Traditionally, closing this gap meant hiring models, a photographer, a location or studio, and a half-day of production. Even a small 20-piece shoot runs €800–€2,500 when you add it all up. And that's before the editing bill.
The AI Workflow: Flat-Lay at Home, Campaign-Ready Photos in Hours
This is where things have shifted in 2026. The most efficient workflow for small and mid-size fashion brands now looks like this:
1. Photograph flat-lays at home using the setup above — clean white background, good window light, consistent framing. These are your source images.
2. Upload to an AI photo platform like Tellos AI Photo Studio.
3. Receive on-model campaign imagery — realistic photos of your garment on AI-generated models, with proper fit, natural pose, and professional lighting — in under an hour.
The AI takes your flat-lay, understands the garment's shape, colour, and texture, and generates realistic on-model images that show fit and movement. The output is campaign-quality, not "AI-looking." No artifacts, no distorted limbs, no weird fabric rendering.
This is why brands that are serious about scaling their visual output don't choose between home photography and professional shoots — they do both. Home flat-lays for source input, AI for on-model output.
What This Looks Like in Practice
Say you've just received samples for your new autumn capsule: 12 pieces. Here's the workflow comparison:
Traditional: Book a half-day shoot (€1,200+). Prep, steam, model changes, photographer direction. Edit and receive images 5–10 days later. Maybe reshoot 2 items that didn't work.
AI workflow: Spend 2 hours at home photographing flat-lays. Upload to Tellos. By the same afternoon you have professional on-model images for all 12 pieces. Total cost: fraction of a traditional shoot.
The math gets more compelling as your SKU count grows. If you're shooting colour variants, a 10-style × 6-colour catalog would take multiple shooting days traditionally. With AI, you generate all 60 hero shots from 10 flat-lays.
Using AI for Size-Inclusive Photography
One area where home photography truly can't help: showing your garments across multiple body types. Booking diverse model sizes is expensive and logistically complex — most small brands simply don't do it.
AI makes this trivial. Once you have a flat-lay source image, you can generate the same garment on models across the full size range (XS to 3XL), across different skin tones and ages — at no extra cost or time. Customers who see a realistic fit on a body similar to theirs convert more and return less. It's one of the highest-leverage visual upgrades a brand can make.
When Home Photography Still Makes Sense
AI on-model imagery is not the right tool for every situation. There are still good reasons to shoot in-house:
- Texture and detail shots — macro close-ups of fabric weave, buttons, stitching detail, zip quality. AI can't replace this, and you don't need a studio to do it well.
- Lifestyle and brand story content — real people, real places, real moments. UGC-style content performs well on social and in brand story contexts, and authenticity matters there.
- Source material for AI — you do still need flat-lays or sample shots as AI inputs. So your home setup still earns its keep.
The UGC vs AI photography debate comes up a lot — the short answer is they serve different jobs. AI wins for PDPs and catalog production. UGC wins for social proof and raw authenticity. Smart brands use both.
A Practical Home Photography Checklist
Before every shoot:
- Steam all garments — 100% of the time, no exceptions
- Charge phone / camera
- Set up white background (foam board, clean and no marks)
- Open window for natural light — close blinds on other windows to avoid mixed sources
- Set up tripod, mark floor position with tape
- Put camera on manual or lock exposure after first shot
- Shoot extra angles — minimum 3 per garment (front, back, detail)
After shooting:
- Quick edit: brightness/white balance correction, straighten if needed
- Export all images at consistent resolution (2000px minimum on long edge)
- Upload flat-lays to AI platform for on-model generation if needed
Getting From Flat-Lay to Campaign-Ready
If you're reading this as a new brand, here's the honest summary: you can get quality flat-lays at home with a white background, good natural light, a tripod, and consistent framing. That's genuinely achievable and worth doing.
But flat-lays have a ceiling. On-model images convert better, reduce returns, and tell a brand story that a garment on a white floor simply cannot.
The gap between "home flat-lay quality" and "campaign-ready on-model imagery" used to require a full production budget. It doesn't anymore. The workflow is: photograph well at home → upload to AI → receive professional campaign content. It's the most efficient visual production stack available to a fashion brand at any size.
If you're producing content for PDPs, lookbooks, or seasonal launches, that's the workflow to know about.
Ready to Turn Your Flat-Lays Into On-Model Campaign Photos?
Tellos AI Photo Studio takes your flat-lay source images and generates realistic, on-model photography — same-day, at any scale. Whether you're shooting 5 pieces or 500, the workflow is the same.
No studio. No model booking. No editing backlog. Just upload and receive campaign-ready images built from the flat-lays you're already taking at home.